Hello Crafters!
I can't believe it's about to be April! I've already seen little buds sprouting on the trees. Those flowers are getting ready to show themselves soon and I can't wait.
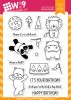
Speaking of flowers...among all the gorgeous ones released this month we also released some pretty cute character stamps. Even though I have a mad crazy love for those flowers, I can't resist cute critters either!

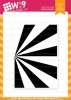
For me the big top background just makes this card! I love how easy it is to line up and fill the entire background. You can see just how easy, along with the entire making on the card, in the video below.
That juggling bear just makes me smile! I love how the accessories in the set really support a scene style card. Since I used the die cut panel I couldn't fit all the characters in my card. I guess it's a good excuse to have to use the set again.

You can find a full list of supplies used on today's card HERE on my blog.
Thanks so much for visiting!

Featured Supplies
For your convenience, here is a list of the featured Wplus9 supplies used on today's project(s), along with links to purchase. For a complete list of all supplies, click here.


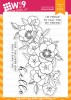


 WPlus9 Petunia Builder Stamp Set
Shop at:
WPlus9 Petunia Builder Stamp Set
Shop at:
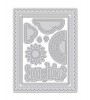
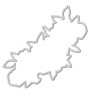
 WPlus9 Petunia Builder Die Set
Shop at:
WPlus9 Petunia Builder Die Set
Shop at:
 WPlus9 Kind Soul Stamp Set
Shop at:
WPlus9 Kind Soul Stamp Set
Shop at:
 WPlus9 Big Top Background Stamp Set
Shop at:
WPlus9 Big Top Background Stamp Set
Shop at:
 WPlus9 Fairy Dust Dye Ink
Shop at:
WPlus9 Fairy Dust Dye Ink
Shop at:
 WPlus9 Miami Spice Dye Ink
Shop at:
WPlus9 Miami Spice Dye Ink
Shop at:
 WPlus9 Sweet Nectar Dye Ink
Shop at:
WPlus9 Sweet Nectar Dye Ink
Shop at:
 WPlus9 Flamingo Dye Ink
Shop at:
WPlus9 Flamingo Dye Ink
Shop at:
 WPlus9 Bloomsberry Dye Ink
Shop at:
WPlus9 Bloomsberry Dye Ink
Shop at:
 Wplus9 Cockleshell Dye Ink
Shop at:
Wplus9 Cockleshell Dye Ink
Shop at:
 WPlus9 Cranberry Crush Dye Ink
Shop at:
WPlus9 Cranberry Crush Dye Ink
Shop at:
 WPlus9 Last Leaf Dye Ink
Shop at:
WPlus9 Last Leaf Dye Ink
Shop at:
 WPlus9 Appletini Dye Ink
Shop at:
WPlus9 Appletini Dye Ink
Shop at:
 Wplus9 Shell Pink Dye Ink
Shop at:
Wplus9 Shell Pink Dye Ink
Shop at:
 WPlus9 Little Piggy Dye Ink
Shop at:
WPlus9 Little Piggy Dye Ink
Shop at:
 WPlus9 Sweet Gelato Dye Ink
Shop at:
WPlus9 Sweet Gelato Dye Ink
Shop at:
 WPlus9 Enamel Dots - Autumn Splendor Blue
Shop at:
WPlus9 Enamel Dots - Autumn Splendor Blue
Shop at:
 Spellbinders Platinum 6 Die Cutting Machine
Shop at:
Spellbinders Platinum 6 Die Cutting Machine
Shop at:
 Simon Says Stamp Intense Black Ink Pad
Shop at:
Simon Says Stamp Intense Black Ink Pad
Shop at:
 Neenah 80 Solar White Paper Pack 250 Sheets
Shop at:
Neenah 80 Solar White Paper Pack 250 Sheets
Shop at:
 Mini Misti Stamping Tool
Shop at:
Mini Misti Stamping Tool
Shop at:
 Scrapbook Adhesives White Foam Squares
Shop at:
Scrapbook Adhesives White Foam Squares
Shop at:
 EZ Runner Grand - Permanent
Shop at:
EZ Runner Grand - Permanent
Shop at:
 EZ Runner Grand - Permanent - Refill
Shop at:
EZ Runner Grand - Permanent - Refill
Shop at:
 Tonic Deluxe Adhesive Nuvo Glue
Shop at:
Tonic Deluxe Adhesive Nuvo Glue
Shop at:


